Section 1 - Downloading ADT Files
1A.1.1 Getting the .h Files
All the code for our many abstract data type implementations in C++ can be found in the various include files available to you through the download
Download that file and unzip it into a safe place. You will see 20 or so .h files, each of which has the template(s) for that specific ADT (as well as a few application specific .cpp files that will assist us in doing assignments). The next twelve weeks will consist of the in-depth motivation for and description of that code. You are not expected to be able to understand or reproduce this code yet, but after completing the course, you'll be intimately familiar with it.
Overview of the Steps
Since this is a tutorial on how to import the cs_2c template files into a project, you'll need to have some project open if you want to do this with me. So, create or open any C++ project in VC+, Eclipse or your preferred IDE. Then, move or copy all the .h files into your IDE's project folder where include and source files normally go. In any project that uses them, include the file in the "header files" section of the explorer window for easy access. Also, in your client source, #include the appropriate file name(s). Here is a screen shot of a project that has all the files included, and shows the selection of the file FHavlTree.h and its contents:
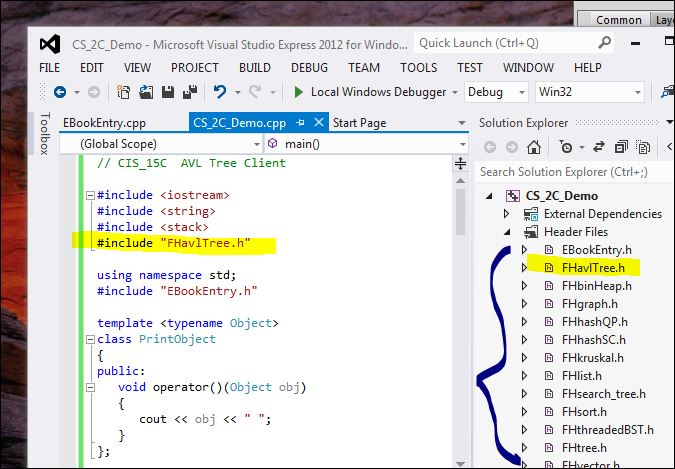
(You will have to read the detailed steps below to match this screens shot, so don't expect yours to look like mine just yet.)
If you are using an IDE other than VC++ or Eclipse, you'll have to discover the equivalent steps by searching the web. The idea is simple:
- Expand the .zip file to a folder.
- Open a C++ project in which to work.
- Copy the .h (and .cpp) files into your project's source folder.
- From your IDE, "add" the .h and .cpp files so you can see them from the IDE's explorer window.
1A.1.2 Details for VC++ on Windows
Let's start from the beginning and show each step in detail for VC++.
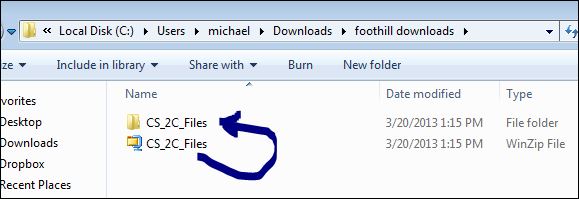
Find the Download
Locate the downloaded .zip on your file system and, if it was not automatically expanded, extract the files. They :
Open a Project
Next, open VC++ and start or open a project. Even a Hello World! project will do for demonstration purposes.
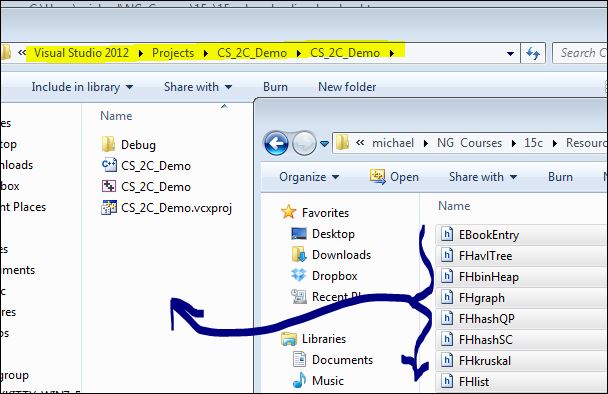
Copy the Source Files
Move or copy all the .h and .cpp files into your IDE's project folder where include and/or source files normally go. In Visual C++ on Windows this is your project directory. If, for example, your project is named "CS_SC_Demo", this will usually be the directory:
C:\Users\<YOU>\Documents\Visual Studio 2012\Projects\CS_SC_Demo\CS_SC_Demo
(Note that it's going into the inner of the two identical CS_SC_Demo directories.)
Here, we see the files being moved into our project's source directory:
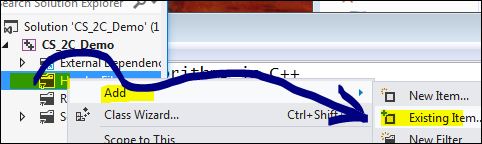
Import the Source Into Your Project
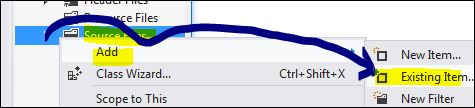
The .h files may be usable even without incorporating them into your project's explorer window, but it is often useful to see them there. Here, we can "add" each .h file into the Headers section by right-clicking on Headers → Add → Existing Item, and selecting the .h file(s) to add.
We do the same thing for the .cpp files, but those fit better in the Source section:
Test Hello World!
Take a moment to compile and run your Hello World! program with the new files installed. At the very least, we should not have any fatal errors. There might be some warnings in the ADT files, but ignore those; they are inevitable. If you cannot get Hello World! to compile and run, then you'll need to retrace your steps. If you can, then we go on to the real test.
Test Your Installation
Here is a short program that tests many aspects of the installation. Replace the contents of your main .cpp file with this:
// FHgraph and djikstra algorithm
// CS 2C Foothill College

#include <iostream>
#include <string>
using namespace std;

#include "FHgraph.h"

// string is the data of the vertex; int is the cost type of edges
// --------------- main ---------------
int main()
{
   // build graph
   FHgraph<string, int> myGraph1;
   myGraph1.addEdge("v1","v2", 2);    myGraph1.addEdge("v1","v4", 1);
   myGraph1.addEdge("v2","v4", 3);    myGraph1.addEdge("v2","v5", 10);
   myGraph1.addEdge("v3","v1", 4);    myGraph1.addEdge("v3","v6", 5);
   myGraph1.addEdge("v4","v3", 2);    myGraph1.addEdge("v4","v5", 2);
   myGraph1.addEdge("v4","v6", 8);    myGraph1.addEdge("v4","v7", 4);
   myGraph1.addEdge("v5","v7", 6);
   myGraph1.addEdge("v7","v6", 1);

   // for debugging - only works if cout << overloaded for data type
   myGraph1.showAdjTable();

   // dijkstra called from inside
   myGraph1.showDistancesTo("v2");
   cout << endl;

   myGraph1.showShortestPath("v2", "v3");
   myGraph1.showShortestPath("v2", "v6");
   myGraph1.showShortestPath("v2", "v7");
   cout << endl;

   return 0;
}
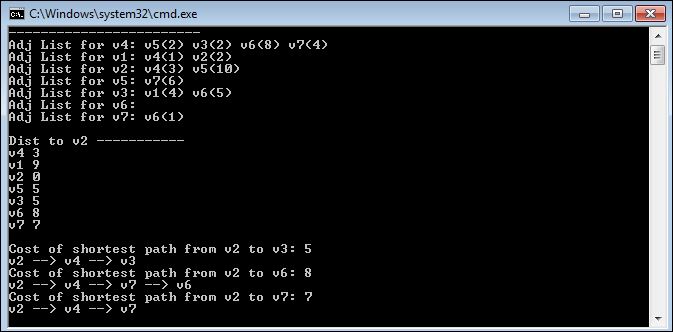
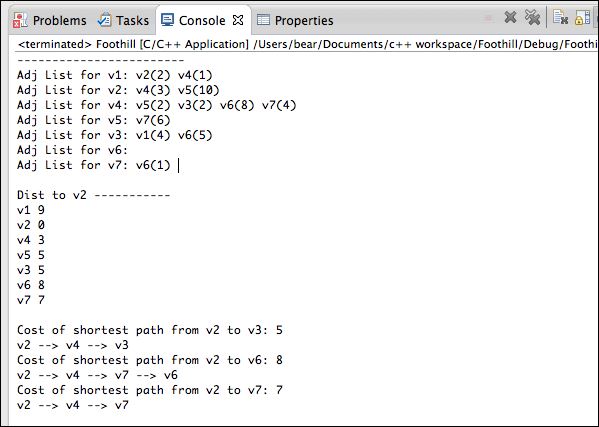
When run, you should see:
1A.1.3 Details for Eclipse on Mac
Let's start from the beginning and show each step in detail for Eclipse for C/C++.
Find the Download
Locate the downloaded .zip on your file system. It should be in the Downloads stack.
Open a Project
Next, open Eclipse and start or open a project. Even a Hello World! project will do for demonstration purposes.
Copy the Source Files
Move or copy all the .h and .cpp files into your IDE's project folder where include and/or source files normally go. In Eclipse on a Mac this is your project directory. If, for example, your project is named "Foothill", this will usually be the directory:
Mac HD:/Users/<YOU>/Documents/c++ workspace/Foothill/src
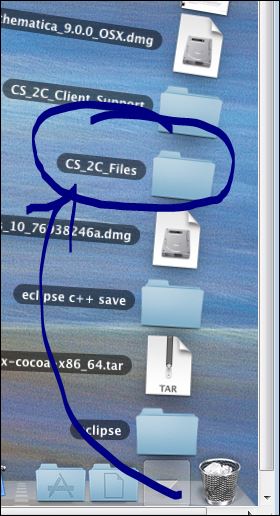
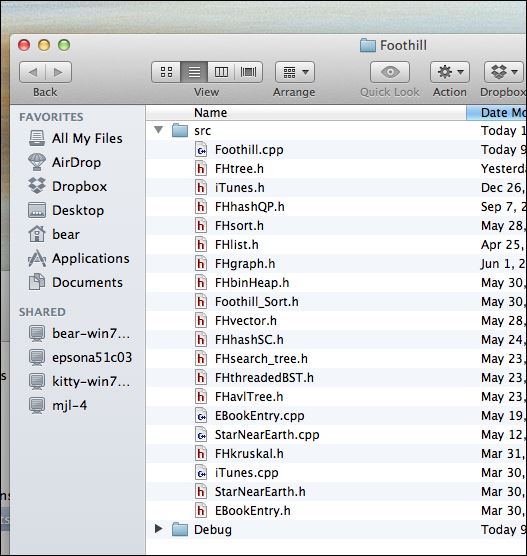
Here, we see the files being moved into our project's source directory:
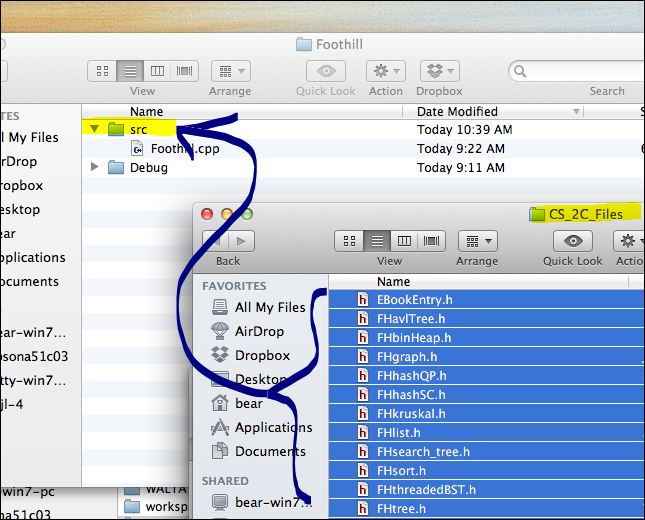
and here they are after being copied:
Import the Source Into Your Project
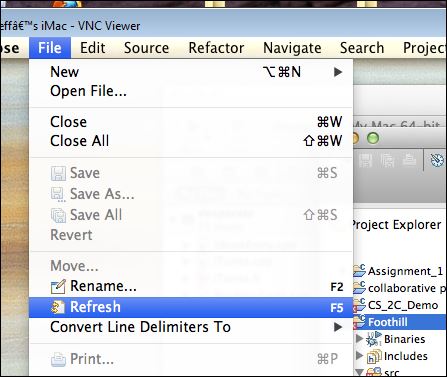
The .h files may be usable even without incorporating them into your project's explorer window, but it is often useful to see them there. Here, we will refresh our project's explorer contents by clicking on our project to select it, then clicking File → Refresh.
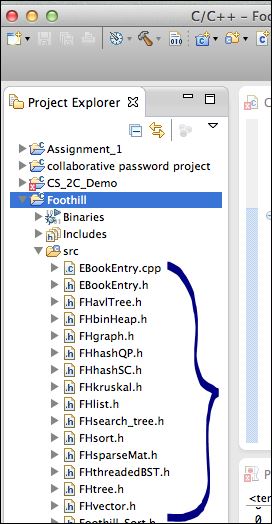
All the new files, both .h and .cpp, should appear under your project:
Test Hello World!
Take a moment to compile and run your Hello World! program with the new files installed. At the very least, we should not have any fatal errors. There might be some warnings in the ADT files, but ignore those; they are inevitable. If you cannot get Hello World! to compile and run, then you'll need to retrace your steps. If you can, then we go on to the real test.
Test Your Installation
Here is a short program that tests many aspects of the installation. Replace the contents of your main .cpp file with this:
// FHgraph and djikstra algorithm
// CS 2C Foothill College

#include <iostream>
#include <string>
using namespace std;

#include "FHgraph.h"

// string is the data of the vertex; int is the cost type of edges
// --------------- main ---------------
int main()
{
   // build graph
   FHgraph<string, int> myGraph1;
   myGraph1.addEdge("v1","v2", 2);    myGraph1.addEdge("v1","v4", 1);
   myGraph1.addEdge("v2","v4", 3);    myGraph1.addEdge("v2","v5", 10);
   myGraph1.addEdge("v3","v1", 4);    myGraph1.addEdge("v3","v6", 5);
   myGraph1.addEdge("v4","v3", 2);    myGraph1.addEdge("v4","v5", 2);
   myGraph1.addEdge("v4","v6", 8);    myGraph1.addEdge("v4","v7", 4);
   myGraph1.addEdge("v5","v7", 6);
   myGraph1.addEdge("v7","v6", 1);

   // for debugging - only works if cout << overloaded for data type
   myGraph1.showAdjTable();

   // dijkstra called from inside
   myGraph1.showDistancesTo("v2");
   cout << endl;

   myGraph1.showShortestPath("v2", "v3");
   myGraph1.showShortestPath("v2", "v6");
   myGraph1.showShortestPath("v2", "v7");
   cout << endl;

   return 0;
}
When run, you should see:
If you are using a MAC, you have completed the import of the ADT and support source files into your project.
Because of frustrating new problems with Eclipse, there may be "unreal" fatal errors listed. While very unpleasant, they are not necessarily deal breakers. You may still be able to Run and find that the program actually builds and runs.
For example, either now, or at some point in the future, you might be forced to look at these buggers:
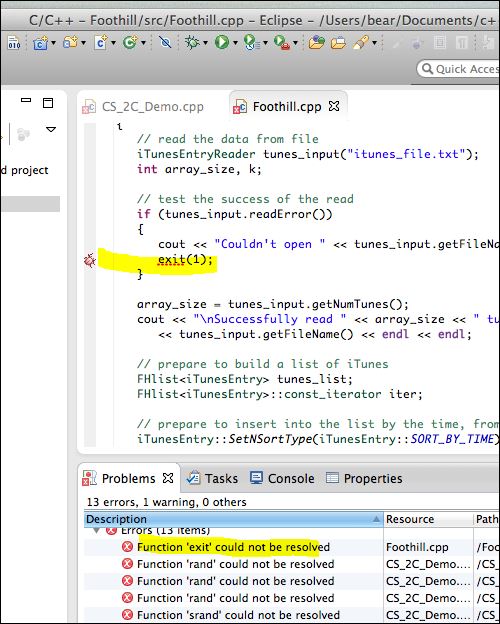
Yet, if you Build Project then Run, things may work. This is something that I have not been able to find a solution for. You can either work around it (when the program won't run, then you have to distinguish the real errors from these phantoms), or switch to pure Xcode, which you already have installed under Eclipse. Xcode is actually pretty easy to use, and roughly the same as Eclipse. I have not created full documentation for that compiler.