Section 3 - GitHub and Remote Collaboration
Unless you are already working for a company that has its own remote VCS, the best way to gain experience to remote tracking and project collaboration is by using the free public access offered by GitHub. The only thing to remember when you get a free GitHub account is that the code on it is publicly viewable and downloadable. (If you want privacy, you have to pay.) Others cannot modify your code on the server without your permission, but they can view, download, compile and modify it on their systems. In fact, this is the whole point.
G3.1 Signing Up
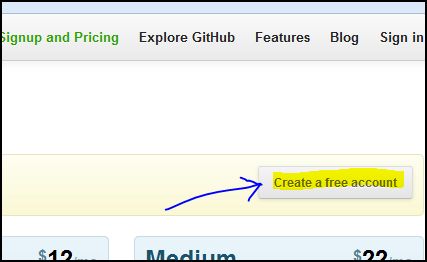
Go to
and create your own account:
G3.2 Creating a Remote Repository
Next, you will create and name a repository for your project. While this is intended to hold the project we started in the last section, its name can be different. You can have multiple repositories, one for each project that you control (including projects that you clone from others and work on as a separate effort). For now, just create a single repo to get started. I'm creating one for the password program that I showed you in the class modules of the beginning C++ course.
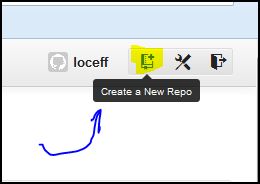
By the way, you'll see some tutorials along the way. Below you find a little help on creating a repository and even setting up Git on your system.
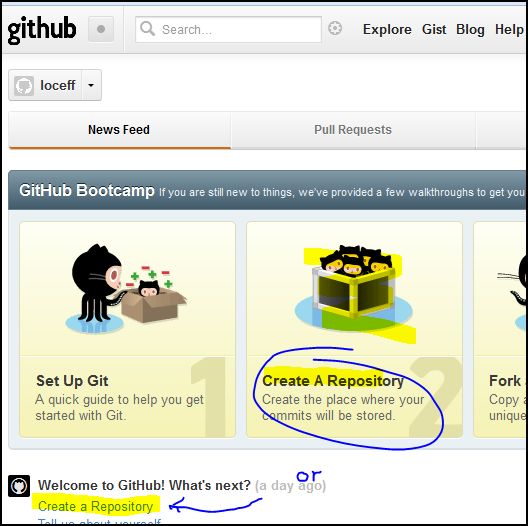
Give the new repo a name (no spaces, please), and set it to be public so others, or even you on a system which is not yet set up, can clone it.

You don't have to do any of the optional things at the bottom of the window since you can take care of those on your local system if you wish. Once you click Create repository, you will see a screen with some advice for your local Git console. The first part tells you how to create a new repo, which you already did, so skip it. But the second part explains how to set your Git environment to know about and connect to this new online repo; it tells you the exact commands to issue in order to make a connection between your local project and the remote GitHub repo you just created.

G3.3 Pushing to the Repo
Setting the Remote Repo
Meanwhile, back at the homestead, we can reopen our Git console (Terminal, Bash, etc.) and move to the directory of our project. Once there, we can first verify that we have no remote server set by issuing the git remote command:
$ git remote

michael@MJL-3A-VISTA64 ~/Documents/Visual Studio 2008/Projects/Assignment_
gnment_1 (master)
$
All that happened was that we got another (long) prompt which means there is no remote server set. (Remember, that long line "michael ..." is part of my prompt. I will cut it out of some of the following console snippets). We heed the advice of GitHub and execute a git remote add command. This will do two things:
- tell our local Git repository where the remote server is, and
- give the remote server a short name, typically "origin."
Notice that GitHub's suggested instruction which I bracketed in blue, above, provide the exact URL that the command will need, so they are very useful. We do it:
$ git remote add origin https://github.com/loceff/password-project.git
After this, a repeat of the git remote command verifies that something is now there:
$ git remote
origin
Using the verbose option, -v, tells us the association between the remote alias and the full URL:
michael@MJL-3A-VISTA64 ~/Documents/Visual Studio 2008/Projects/Assignment_
gnment_1 (master)
$ git remote -v
origin  https://github.com/loceff/password-project.git (fetch)
origin  https://github.com/loceff/password-project.git (push)
The Initial Push
We are ready to push our repository information to "origin", our remote host. This is the purpose of the push command. The meaning of the word master is to tell Git which of our branches we want to push; we only have one (master) and don't even know how to create others, yet, so it seems superfluous, but it's needed:
$ git push -u origin master
Username for 'https://github.com': <probably your email>
Password for <your account >: <type password>
Counting objects: 7, done.
Delta compression using up to 8 threads.
Compressing objects: 100% (7/7), done.
Writing objects: 100% (7/7), 2.03 KiB, done.
Total 7 (delta 1), reused 0 (delta 0)
To https://github.com/loceff/password-project.git
* [new branch]      master -> master
Branch master set up to track remote branch master from origin.
In this case, we had to provide an ID and password for the push. Had we set up some security parameters, we could have avoided this step, not something by which we want to be distracted at this time.
We can go back to our GitHub web page and see that the tracked files are there. Click on the project.
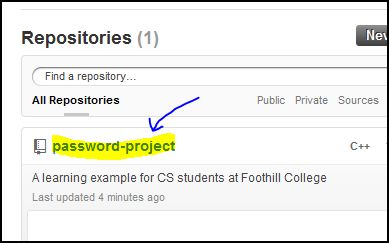
We see a list of familiar files -- very promising:
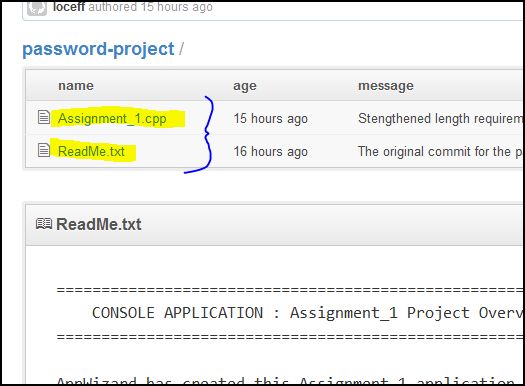
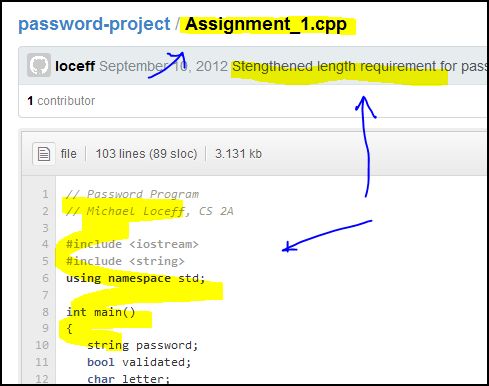
And if we click on the .cpp file, we can view its contents.
G3.4 Fetching the Repo
During the normal course of project workflow, you will be sitting down to your system and fetching the current snapshot of the repo as it is at that moment, thus assuring that you will be working on the most current version. This is known as a fetch. (Sometimes you will hear it called a pull, which is a more powerful fetch that does a couple things at once. While we will talk of pushes and pulls, informally, sometimes we say pull when we will actually be doing the more cautious fetch. I won't demonstrate the pull command in this tutorial -- it is essentially a fetch + merge.)
The command is git fetch origin:
michael@MJL-3A-VISTA64 ~/Documents/Visual Studio 2008/Projects/Assignment_1/A
gnment_1 (master)
$ git status
# On branch master
# Untracked files:
#   (use "git add <file>..." to include in what will be committed)
#
#       Assignment_1.vcproj
#       Assignment_1.vcproj.mjl-3a-vista64.michael.user
#       Debug/
nothing added to commit but untracked files present (use "git add" to track)
A status showed us that nothing changed, which is no surprise since we just did a push and no one else made any changes to the repo.
Merging
But if someone else had pushed changes, we would see the following during the fetch:
$ git fetch origin
remote: Counting objects: 5, done.
remote: Compressing objects: 100% (2/2), done.
remote: Total 3 (delta 1), reused 3 (delta 1)
Unpacking objects: 100% (3/3), done.
From https://github.com/loceff/password-project
42f6803..18bef63  master     -> origin/master
A status will also confirm we have a mismatch between what we just fetched and our local files:
$ git status # On branch master # Your branch is behind 'origin/master' by 1 commit, and can be fast-forwarded. # # Untracked files: # (use "git add..." to include in what will be committed) # # Assignment_1.vcproj # Assignment_1.vcproj.mjl-3a-vista64.michael.user # Debug/ nothing added to commit but untracked files present (use "git add" to track)
There are now two masters -- the one that is in our project, based on our latest changes, and the one I just fetched, which we are told is "ahead" of our ("Your branch is behind origin/master by 1 commit"). One way to see what changed is to ask for a log of the difference between the two. Let's use the git log command, and tell it to show us the log notes between my master (the older snapshot on my system), and the origin/master (the newer snapshot on origin that we have downloaded, but not merged into our project).
Where is this unmerged origin/master? We can't see it within our project directory: that's got our old files in it. Answer: it is in the .git subdirectory, packed away in Git's secret ninja format. It is actually local now, but not visible to us. In fact, aside from the push and fetch, all these commits, adds, and merges that we do in Git are done off-line. We can be in an airplane or at the cabin and continue to work "collaboratively."
Here the term master refers to my master branch, the only branch I am using on my local system. The term origin/master refers to the master branch on the remote server, which we are calling origin. So, let's issue a log command to see what the difference between the two masters is:
$ git log master..origin/master
commit 18bef637004ecd6374a57a5262205b0b94e7b0d2
Author: dr. sheldon cooper <coopshelfox@ucla.edu>
Date:   Tue Sep 11 16:46:02 2012 -0700

added a dash, '-', as an allowable password character.
I see. Dr. Sheldon Cooper changed the source so as to make a dash legal for password characters. We can use the diff tool to see the exact lines, but for this tutorial, let's just accept it and merge that change into our repo so as to get our files updated. This done with the merge command:
$ git merge origin/master
Updating 42f6803..18bef63
Fast-forward
Assignment_1.cpp | 4 +++-
1 file changed, 3 insertions(+), 1 deletion(-)
We have just merged the remote origin/master into our local files. Let's open the project to see if the change is there:
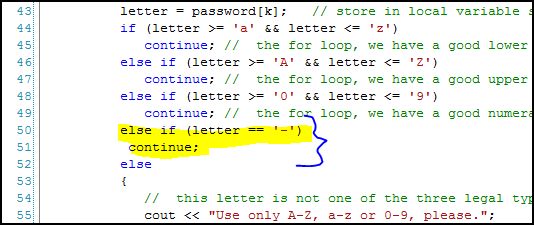
Yes -- this was not part of our last source, so the new code has been incorporated into our master branch.
This is one of the main uses of a CVS like Git. It enables us move forward, collaboratively, in a systematic way. There are ways to return to previous snapshots of the project, undo changes, and be working on multiple versions of the same project in parallel.
G3.5 Cloning a Repo
If you were not the originator of the project, or you are on a computer that has no repo for the project yet, rather than doing a git init, you would execute a git clone. One way to do this is to
- create a small Hello World! project,
- get it to compile and run just to make sure you have all your IDE files in place and working,
- delete the main source file for the Hello World! ("Foothill.java" or "Hello World Proj.cpp", say) because the files we "pull" down will contain all the sources we need, and these existing ones will just get in the way,
- from our console (Terminal or Bash) window, navigate to the directory where our sources need to live, and
- execute clone as shown below.
$ git clone git://github.com/loceff/password-project.git
This creates a new repo for us with the files already in place. We can fire up our IDE to make sure the files are visible, and try to compile and run them. Assuming all goes well, we are now in position to start developing. We can push our changes to the server and become part of the development team. (We need to have push privileges or have the account information of the remote repo in order for the pushes to work.)
G3.6 More Information
This has been a brief intro to version control systems using Git and GitHub. It took us on a side trip from our main topics, but it's important that you be aware of this institution, since it heavily influences software development these days. For more information you can look at the many (better?) tutorials on the web.
- For a solid Git tutorial, I recommend: http://git-scm.com/book
- There is a good Set Up Git tutorial as well as a useful FAQ at the GitHub Help Center: https://help.github.com/
- For the latest GUI GitHub clients for Mac, Windows, Eclipse, etc. go to https://github.com/ and at the bottom of the page, see "Clients"