Section 7 - Multi-File Projects
3B.7.1 Creating a Pair of Files for Your MyStack Class
We have been writing our programs in a single source file up to this point. As projects contain more classes, this makes the files hard to navigate and organize. The standard practice for C++ programs is to create a pair of files for each major class:
- A header file, or a .h file (h is for header) that contains the class prototype.
- A source file, or .cpp file, that contains the method definitions.
This is a simple matter. In our MyStack example we would create two new files, MyStack.h and MyStack.cpp, and place the prototype and method definitions in the two files, respectively. We will have to also add a couple lines at the top of the main file (the Foothill.cpp, or whatever yours is called, where our main() will remain). This operation will leave our main() file as clean as a garage after a garage sale.
3B.7.2 The Header File
Make sure that you have created a project like the one in the last section, and get the bugs out so we start clean. Now, we will break the one file (which I'll call Foothill.cpp) into three:
- Foothill.cpp (will contain the main() method)
- MyStack.h (will contain the class prototype for MyStack)
- MyStack.cpp (will contain the method definitions for MyStack)
We start with the header file. Right-click on Header Files and select Add → New Item...:

When you are given a dialog box, select the Header File (.h) icon, and give the file the name MyStack (the .h will be attached for you; don't type that part):

Next, find the header file MyStack.h in your explorer window to the left, and double-click it. It will bring an empty window forward. You should paste the class prototype for MyStack class into this empty file. (Actually, you'll have to re-select the Foothill.cpp file to grab that prototype, then re-expose the MyStack.h file to do the paste). You will also add one line
#pragma once
at the top of this new file. When you are done, MyStack.h will look like this:
#pragma once

// ---------- Class MyStack Prototype -----------
class MyStack
{
private:
  static const int SIZE = 5;
  double stck[SIZE];
  int tos;

public:
  MyStack();
  bool push(double item);
  bool pop(double &item);
  void clearStack();
  bool testStack(int num_requested = 1);
}; // end of  MyStack prototype -----------------
So what does the #pragma once mean? It prevents a nasty infinite nesting when files include other files that include still other files that include ... until eventually some file gets included twice.
3B.7.3 The Class .cpp File
Now we do the same thing with the method definitions.
Right-click on Source Files and select Add → New Item...:

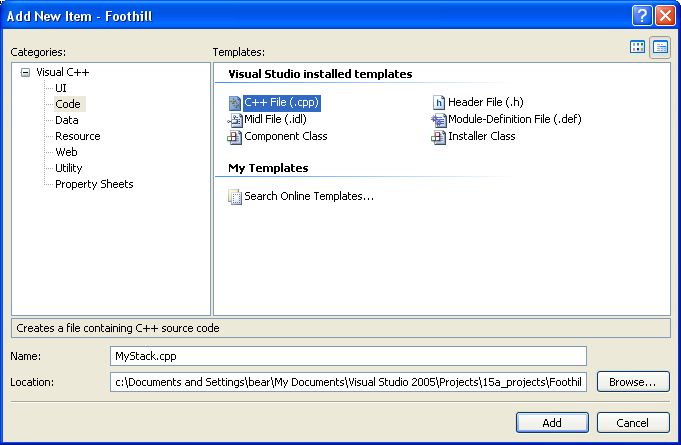
When you are given a dialog box, select the C++ File (.cpp) icon, and give the file the name MyStack (the .cpp will be attached for you; don't type that part):
Next, find the .cpp file in your explorer to the left, and double-click it. It will bring an empty window forward. You should paste the method definitions for MyStack class into this empty file. (Again, you'll have to re-select the Foothill.cpp file to grab those definitions, then re-expose the MyStack.cpp file to do the paste). You will also add one line
#include "MyStack.h"
at the top of this new file. When you are done, MyStack.cpp will look like this:
#include "MyStack.h"

// ----------- Class MyStack Definitions ------------
MyStack::MyStack()
{
  tos = 0;
}

// ---------------------------------------------------
// since you can assign a literal to a string variable,
// you can also pass a literal argument to a method that takes
// a string formal parameter
bool MyStack::push( double item )
{
if (tos == SIZE)
return false;
stck[tos++] = item;
return true;
}

// ---------------------------------------------------
bool MyStack::pop(double &item)
{
if (tos==0)
return false;

item =  stck[--tos];
return true;
}
// ---------------------------------------------------
void MyStack::clearStack()
{
tos = 0;
}

// ---------------------------------------------------

bool MyStack::testStack(int num_requested)
{
if (tos >= num_requested)
return true;
else
return false;
}
// end of  MyStack definitions -------------------------
Note that you have #include-d the header file at the top so that this .cpp file can "see" the class prototype.
Finally, go back to the main Foothill.cpp file and DELETE the class prototype and class method definitions. You will be left with only the main() method and the original headers. You will add the one #include "MyStack.h" line near the top of this main file, so that, when done, it will contain only the following:
#include <iostream>
#include "MyStack.h"
using namespace std;

int main()
{
  MyStack stk1, stk2;
  int k;
  double result;

  // Test the Stack -----
  if ( !stk1.testStack(1) )
    cout << "empty stack; cannot pop\n";

  // push too much intentionally
  for (k = 0; k < 10; k++)
    if ( ! stk1.push( k * 1.1 ) )
      cout << "stack stk1 full; cannot push\n";

  for (k = 0; k < 5; k++)
    if ( ! stk2.push( k * 9 ) )
      cout << "stack stk2 full; cannot push\n";

  // pop too much intentionally (use testStack() for fun)
  cout << "\n--------- First Stack ---------\n";
  for (k = 0; k < 8; k++)
    if ( stk1.testStack(1) )
    {
      stk1.pop(result);
      cout << result << " : ";
    }
    else
      cout << "(empty stack; cannot pop) :";
    cout << endl;

  // pop but test with pop(), not teststack()
  cout << "\n--------- Second Stack ---------\n";
  for (k = 0; k < 8; k++)
  if ( stk2.pop(result) )
    cout << result << " : ";
  else
    cout << "(empty stack; cannot pop) :";
  cout << endl << endl;

  return 0;
}
Re-build your project and fix any typos or mistakes that occurred in the remodeling process. You have successfully split your project into three files, a main file, and two files for your class. Congratulations. This is how it's done in the big leagues.
This makes your projects much easier to navigate.
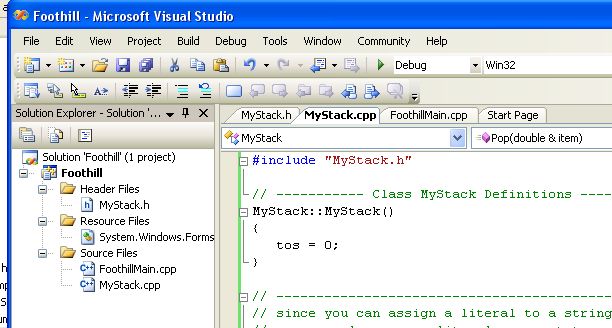
Below is a snapshot of the whole thing at the end. It shows the two new files in your solution explorer (left) and the tabs for each of the files in the top center, with the MyStack.cpp file selected:
3B.7.4 Where We Were, Where We're Headed
That's all for this week. We have reviewed and/or introduced all fundamental C++ concepts. You have a solid foundation of the language, basic programming practices, examples of data structures (stacks, arrays), review of Strings, a working knowledge of multi-dimensional arrays and the foundation of classes and objects.
Now it's time to take a quantum step. Next week we will learn the key concept of advanced Object-Oriented Programming: Inheritance.

Prevent Point Loss
- Don't be "verbose." In methods like constructors, mutators, or other non-I/O member functions, do not do any output - even in the case of an error. Leave the decision of how and when to do output to the client. (1 - 2 point penalty)
- Methods that should not be instance functions. Some methods should not be instance member functions. If the method does not act on the class data or acts on it in a way that is so specialized that only one application out of a million will make use of it, it should not be in your class. Make this an ordinary (static client or static main class) method, not a method of a lower-level class. (2 - 3 point penalty)
- Methods that should be instance functions. On the other hand, if a static method (or a method of some other class) takes only one object of a class as a parameter and works only on that one object, then it probably should be made an instance method of that object's class, and the object parameter should be removed. The reason we can eliminate the parameter once we make the method an instance method (of the previously passed-object's class) is that the object is then passed intrinsically to the method via the "this" object. (2 - 3 point penalty)
Rest up and get ready for action.